Pages

Monday, April 30, 2012

DIY Bracelet Display Holder


Since i've already made a necklace display and a ring display, I of course had to make a bracelet display! It was super easy! This is what I did.

Materials:
  •  empty paper towel roll
  • pretty fabric three inches wider than your paper towel roll
  • fabric three inches wider than your paper towel roll (this will be wrapped around the paper towel roll to give it some padding)
  • scrap pieces of fabric
  • hot glue/hot glue gun
  • felt
  • scissors
  • candle stick

find yourself a paper towel roll!

now stuff the roll with scrap fabric

cover the roll in the first layer of fabric, to give it some padding. Remember to hot glue the seam together! Then stuff the ends into the tube

now cover the roll in your pretty fabric and hot glue the seam together. Now you just wrap the ends up like you would a present.
now you just cut a small piece of felt and glue it onto the candle stick and then glue on the fabric roll. TA DA!! You now have your very own bracelet display holder!!!

Sunday, April 29, 2012

Friday, April 27, 2012

Random Pictures From a While Ago...

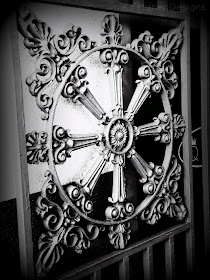
These pictures are actually from my trip to Los Angeles a while back. I actually forgot I had taken these! I was in LOVE with these gates! I wanted to take them home with me, I loved the detail on them!


Wednesday, April 25, 2012

DIY Frame Ring Display Holder

Since I've been making a lot of rings lately I stumbled upon a small problem, I had no cute ring holder that I could easily display my rings on. I mean yes I had some bowls and plates, but I wanted cute, and I mean super cute (of course why would I settle for less, right?) and I wasn't about to spend a lot of money at the store for a pre-made ring holder that wasn't exactly what I was looking for (i'm just a tad bit picky I guess). So what did I do?? I googled it! and I stumbled upon this blog here, she has an amazing tutorial. So instead of trying to re-word her tutorial on how to make it i'm just going to have you look at hers. I obviously didn't follow it exactly because I used a frame not a box, but you can use anything you want to turn into a ring holder. In the end I made the perfect ring holder display and it didn't cost me a thing!


Tuesday, April 24, 2012

DIY Necklace Display

Yesterday when I made my necklace, I came across a small problem when I was done and ready to take a picture of it...how am I supposed to take a picture of my necklace? So I went online and stumbled upon this tutorial on how to make your very own necklace display stand! It was super easy! Really it was! I just printed out the template and used card stock instead of cardboard and it worked perfectly! And best of all it was FREE!! I didn't have to run to the store and buy one, which made my hubby quite happy!


Monday, April 23, 2012

My First Necklace!

Yes, it was only just a matter of time before I attempted to make myself a necklace. So here it is! I made all the little jump rings (I used a screw to wrap the wire around to make the jump rings smaller, then used my pencil to make the larger rings) and turned my pearl bead into a little pendant by wrapping some wire around it and attaching it to the rest of the chain. I wanted to make the larger rings on the necklace look different than the rest of the rings so I gave them some texture to them by squishing the rings between some pliers (if you look closely at the larger rings you can see what I mean) I think they turned out good and added a little something to the necklace.


Sunday, April 22, 2012

Beautiful Day!

It's such a beautiful day today that I had to go outside and take a few pictures!!


Friday, April 20, 2012

Jump Ring Chain Bracelet

Ok so yesterday I showed you how to make a jump ring chain, well I made mine into a bracelet and attached the pendant I made the other day to it!


Thursday, April 19, 2012

DIY Jump Ring Chain


I am going to show you how to make a jump ring chain! It's super easy, really it really is...you're gonna say "wow, really that's it??" ok so you are going to need...

Materials:
  •  wire (I got mine at the hardware store)
  • round nosed pliers
  • wire cutters
  • pencil (I used a colored pencil)


wrap your wire around your pencil. try to wrap it as tightly as possible

when you have the desired amount of loops you can cut the wire so that it lines up with the cut end at the top

then just cut each ring and ta-da! you now have jump rings!

now you can connect your rings together and make a necklace or a bracelet or key chain or....whatever your little heart desires! you can make different sized rings just by finding different things to wrap your wire around, for example the end of a wooden spoon!


Wednesday, April 18, 2012

Wire Wrapped Pendant

Can you tell i've been trying new things with wire?? I guess you can say i've gone wire wrapped crazy! I bought some glass pendants at Walmart that were on sale and wrapped some copper wire around the top of one of them and voila! You have a much cuter pendant to put on your chain necklace! I think that the copper wire brings out the copper in the glass. And all I used was some pliers, copper wire, and a pendant.


Tuesday, April 17, 2012

Set In Look Wire Wrapped Ring

I was looking through some jewelry books at my local craft sore and I came across something really similar to this and I just had to try this. I think that I did pretty good for my first attempt. I love the copper wire with the copper that's in the bead, it's so sparkly! Love it!


Monday, April 16, 2012

DIY Chain Bracelet

I came across a picture of a similar bracelet on Pinterest and I thought, "hey, I can make one!". So I went to Walmart and bought some chain, a strand of rhinestones, ,and some leather cord (I already had the white cording). All in all I think I spent about $7 and have enough to make another one. I didn't take pictures of every step but I hope I can walk you through it it's very simple, I promise!

Materials:
  • two pieces of chain the length that it takes to go around your wrist
  • one strand of rhinestones the same length as your chain
  • enough leather cording so you can weave it in and out of one of the chains
  • enough white cording so you can wrap around the rhinestones
  • clasps of your choice
  • two jump rings
  • two rhinestone end clasps
  • pliers
(The clasps, jump rings, and the end clasps for the rhinestone strand all came with the chain and rhinestone strand that I bought.)

I weaved the leather cording through one of the chain pieces then I laid all three pieces next to each other and then took my white cording and started to wrap the rhinestone strand to both pieces of chain. Then tie a knot on both of the cords and then using pliers open up the jump rings and put one on each end and put in your closures in  and using your pliers again close the jump rings and ta da! You have a cool new bracelet!  


Sunday, April 15, 2012

Sunday, April 8, 2012

Sunday Quote

About a year ago I came across these quotes and ever since then i've tried to live my life with these quotes in mind, I have been around too many people that just brought me down and ever since these two quotes my life has changed so much for the better it's amazing what just some simple quotes can have on a person's life.


Friday, April 6, 2012

Zumba Master Class with Abraham Hernandez!!!

OMG I was able to attend this Zumba class tonight and let me just say it was AMAZING!! I went with my best friend Megan and it was her first Zumba class ever and she loved it! Of course I had to get my picture taken with Abraham so here it is!!

sorry for the quality...

Travel CD Case

I have been looking for a cute CD case so I can carry all the Cd's I use on a daily basis, but either all the ones I've found are way too expensive for my liking (I'm talking about $8 for an ugly CD case that can hold 24 Cd's) I'm cheapo like that. So I decided to just make myself one. Now I didn't follow a pattern or anything, I just made it up as I went along. Now the end result is a cute CD holder that can hold 10 Cd's that I can carry in my purse without scratching them or having a whole bunch of loose Cd's floating around in my purse and best of all it was FREE! I didn't put a closure on it and I am probably gonna regret it later but I didn't really feel like it need it.  


Thursday, April 5, 2012

MHS Cultural Assembly

I don't know if i've mentioned this before but I volunteer at the local high school and currently teach 18 kids from elementry school all through high school and some past graduates as well, Folkloric and Traditional Dance from Latin America. Now while other kids where having fun messing around during spring break, these kids have been practicing everyday for two hours a day trying to perfect their dances. And all of their hard work and sweat has paid off, on Wednesday they performed at the local high school! And let me tell you I feel like a proud momma!! They were awesome! I couldn't be prouder!
before we went out to the gym!

dancing La Culebra a Folkloric Dance from Mexico

my girls dancing Las Comaleras, a Traditional Dance from El Salvador

Tuesday, April 3, 2012

Clear Button Wire Wrapped Ring

I decided to make myself a second ring using one of my buttons from my stash of cool buttons that I've had for a while now and just couldn't find a perfect use for it...until now! I think this button was meant to become the center of this ring! I love it I wore it all day yesterday! And everyone LOVED it!! I am so excited to make myself a bunch more and trying to make different styles!
(I've linked up here and here and here)


Lil\'Luna


Southern Lovely